24 Custom Walk-In Closet Designs That Make Getting Dressed Feel Like a Dream
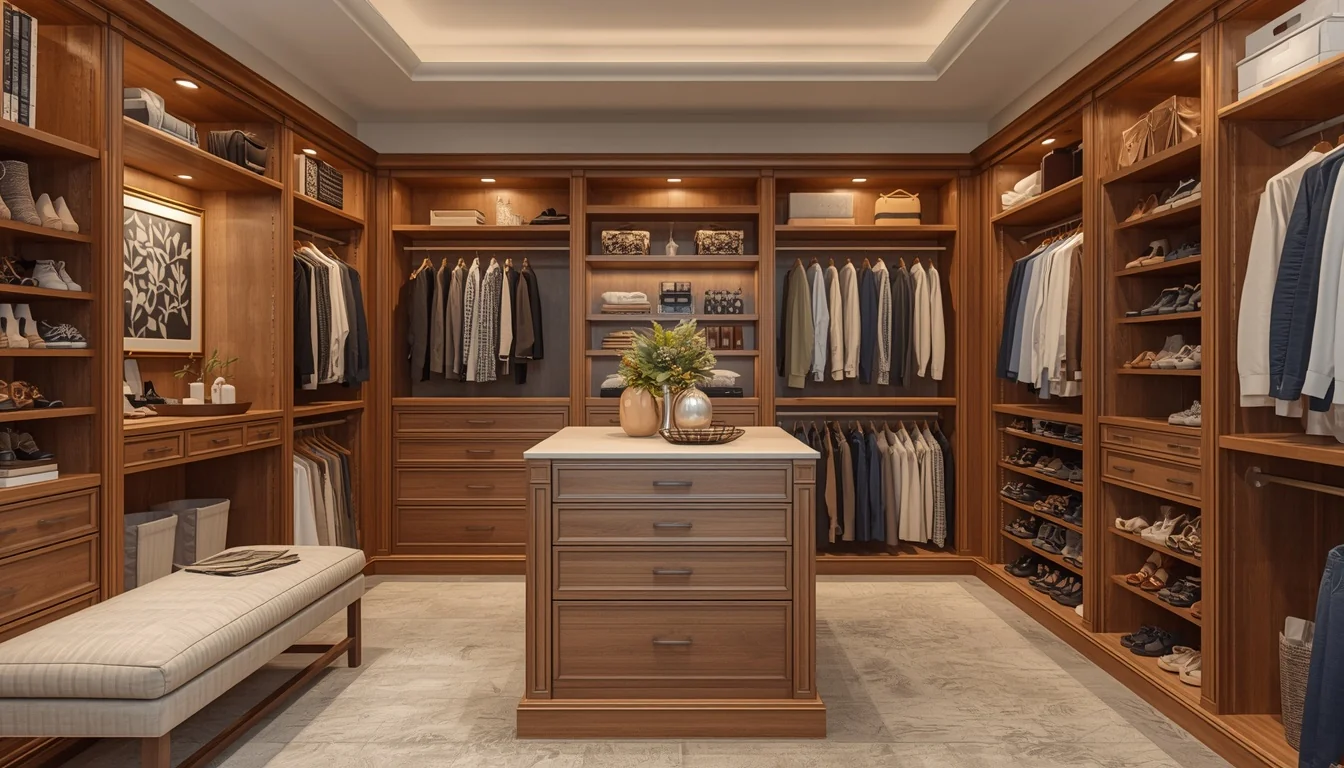
Getting dressed every morning shouldn’t feel like a scavenger hunt. But for most people, it does — wrong lighting, overstuffed rods, shoes piled three-deep, no surface to set anything down on. The closet is the first room you visit every day, and it’s one of the last to get proper design attention.
That’s changing fast in 2026. Walk-in closets are evolving from pure storage into personalized style sanctuaries — spaces with boutique-inspired layouts, elevated finishes, and lighting that makes every piece of clothing look exactly the way it should. The good news is that the best-designed closets aren’t the biggest or the most expensive. They’re the most intentional.
This guide covers 24 custom walk-in closet designs, organized from foundational layout and lighting principles through color and material choices, specialty features, and small-space upgrades — with specific dimensions, product names, and designer decisions explained so you can actually apply them, not just admire them.
Table of Contents
- Why Your Closet Deserves Design Attention
- Layout Foundations: Getting the Structure Right First (Ideas 1–5)
- Lighting That Changes How You See Everything (Ideas 6–9)
- Color, Finish & Material: The Quiet Luxury Direction (Ideas 10–14)
- Feature Upgrades: Islands, Vanities & Display Zones (Ideas 15–19)
- Small Walk-In Closet Ideas That Punch Above Their Weight (Ideas 20–24)
- Designer Tips and Common Mistakes
- Frequently Asked Questions
Why Your Closet Deserves Design Attention?
The average person spends 15 to 20 minutes in their closet every morning. Over a year, that’s over 100 hours in a space most homes treat as an afterthought — a windowless room with a single rod and a bare bulb.
Walk-in closets are evolving into more than just storage. They’re becoming personalized style sanctuaries, with boutique-inspired layouts and elevated finishes designed to feel both functional and indulgent. What was once a luxury for a select few is now an expectation for nearly every homeowner, as the custom closet evolves from pure utility to a space that reflects lifestyle, not just wardrobe.
Two principles underpin every design below. Function before beauty: a beautiful closet that doesn’t suit your actual wardrobe fails the moment you use it. And layering before spending: most closets are let down by one missing element — usually lighting or organization zones — rather than by a lack of expensive materials.
Layout Foundations: Getting the Structure Right First (Ideas 1–5)
Layout is where a walk-in closet either succeeds or fails. The wrong layout wastes space, creates bottlenecks, and forces you into habits that don’t match how you actually use a closet. Get this right first — before choosing finishes, colors, or hardware.
1. Choose the Right Layout for Your Room’s Shape
Answer: Walk-in closet layout should be determined by your room’s dimensions before any other design decision — the shape of the space dictates which layout creates the most usable storage and the smoothest circulation.
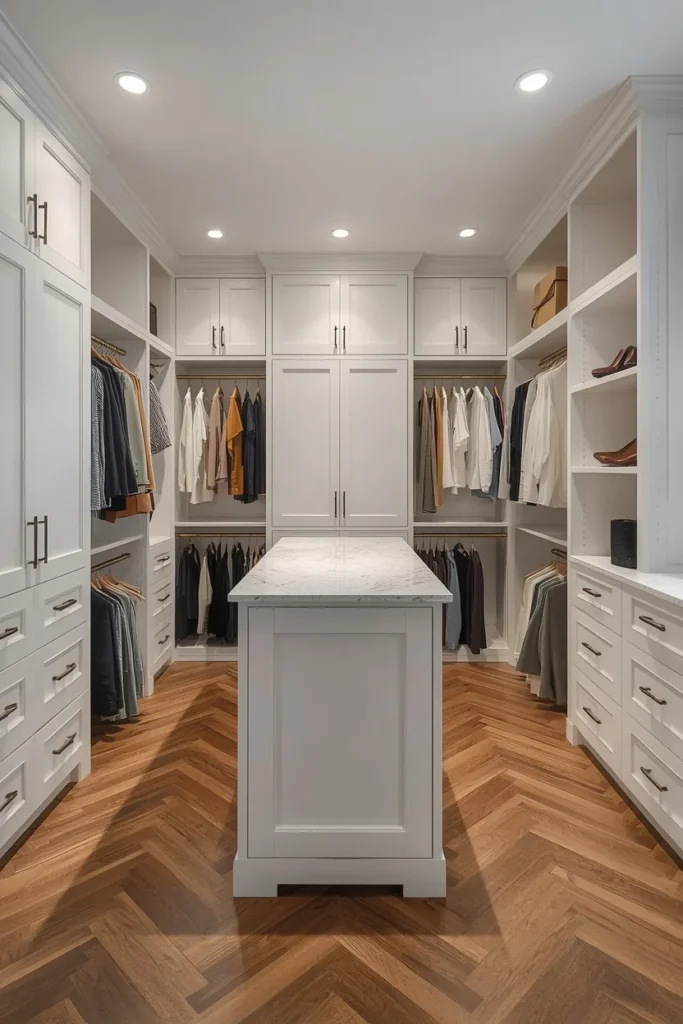
Explanation: Three walls of storage, maximum hanging space, and room for a center island — this is why U-shaped designs remain one of the most popular walk-in closet layouts, offering versatile storage and effortless zoning in a single cohesive space. It works best in rooms at least 7×10 feet, with one wall for long-hang items like coats and dresses, one for double hanging rods, and the third for shelving and shoes.
Practical Example: An L-shaped layout suits narrower rooms (6–8 feet wide), using two adjacent walls for hanging and shelving while leaving the floor open for an ottoman or island. A single corridor layout, with storage on both long walls and a clear walkway down the center, works well in long, narrow rooms.
Comparison — Layout by Room Size:
| Room Dimensions | Best Layout | Key Benefit |
| 4×4 ft minimum | Single-wall | Maximum floor clearance |
| 6×8 ft | L-shaped | Good storage, manageable circulation |
| 7×10 ft+ | U-shaped | Three storage walls, island possible |
| 10×12 ft+ | U-shaped + island | Full dressing room with vanity zone |
Common Mistake: Choosing a layout based on what looks good on Pinterest rather than what suits the actual room dimensions. A U-shaped layout in a room under 7 feet wide creates a walkway too narrow (under 24 inches) for comfortable daily use.
2. Convert Single Rods to Double-Hang Sections
Answer: Converting a single hanging rod to double-hang rods — one at 40 inches and one at 80 inches — nearly doubles hanging capacity in that section without adding a single inch of floor space.
Explanation: A single rod at one height is what most builder-grade closets come with. Converting part of that space to double hanging rods is inexpensive and immediately changes the capacity of the room. Double-hang works for shirts, jackets, folded trousers, and blazers — anything shorter than 42 inches.
Practical Example: Dedicate one full wall to double-hang for everyday wear, reserve a single long-hang section (65 inches clear) for dresses, coats, and suits, and use the remaining wall for shelving, drawers, and shoes.
Designer Secret: Install the lower rod at 40 inches rather than the common 42 inches — this creates a slim but usable shelf above the lower rod where folded items, bags, or boxes can sit.
3. Zone Your Closet Like a Retail Store
Answer: Dividing your closet into dedicated zones — one for hanging, one for folded items, one for shoes, one for accessories — eliminates the daily friction of searching across categories.
Explanation: This year’s layouts emphasize zoned organization — dedicated areas for hanging clothes, folded garments, shoes, and accessories. The principle works exactly like a well-merchandised store: like categories together, each zone sized to what it holds.
Practical Example: Map your actual wardrobe before planning zones. Count long-hang items, folded pieces, and shoe pairs. Size each zone to your actual inventory rather than equal thirds of the room.
Quick Tip: Place the zones you use most (everyday tops, frequently worn shoes) nearest the closet entrance, and seasonal or occasional items (formal wear, rarely worn shoes) in the furthest or highest sections.
4. Maximize Vertical Space From Floor to Ceiling
Answer: Using the full vertical height of a closet wall — not just the standard 7-foot hanging height — is one of the highest-impact changes available without changing the room’s footprint.
Explanation: Custom closets maximize vertical space and eliminate gaps — this is where custom millwork outperforms modular systems, going floor to ceiling to capture storage that standard systems leave unused. Upper cabinets above the standard hanging zone can hold seasonal items, luggage, and storage boxes, while the space below lower rods can accommodate shoe shelves or pull-out drawers.
Practical Example: Full-height doors that span from floor to ceiling make a closet feel taller and more architectural — this detail alone upgrades a room from “functional storage” to “designed space.”
Budget Alternative: Modular systems like IKEA PAX or The Container Store Elfa offer full-height configurations at a fraction of custom millwork cost, and both can be reconfigured as storage needs change over time.
5. Design for Two If the Closet Is Shared
Answer: Shared closets work best when each person has a clearly defined zone — even in a single shared space — rather than intermixed storage that requires constant negotiation.
Explanation: “His and hers” zones create clarity and harmony within a shared space, where each area can be designed to reflect personal style and organizational preferences — whether that’s extra shoe storage, space for ties and watches, or a makeup vanity with lighting controls.
Practical Example: Divide the closet clearly by wall or section rather than by height (top vs. bottom), which is the more common but less effective approach. Two clearly owned walls, even in a small room, eliminates the overlap that makes shared closets feel perpetually disorganized.
Mini Checklist — Layout Foundation:
- Room measured precisely before any layout chosen
- Single rods converted to double-hang where clothing length allows
- Storage zones mapped to actual wardrobe inventory
- Vertical space used to ceiling height
- Shared closets clearly divided by zone, not just height
Lighting That Changes How You See Everything (Ideas 6–9)
Poor lighting is why you leave the house wearing navy thinking it’s black. It’s also why your closet always looks messier than it is. Lighting fixes both problems — and it costs far less than new cabinetry.
6. Layer Three Types of Closet Lighting
Answer: A well-lit closet needs three distinct lighting layers: ambient (general illumination), task (focused light on specific zones), and accent (display or mood lighting), not just a single overhead fixture.
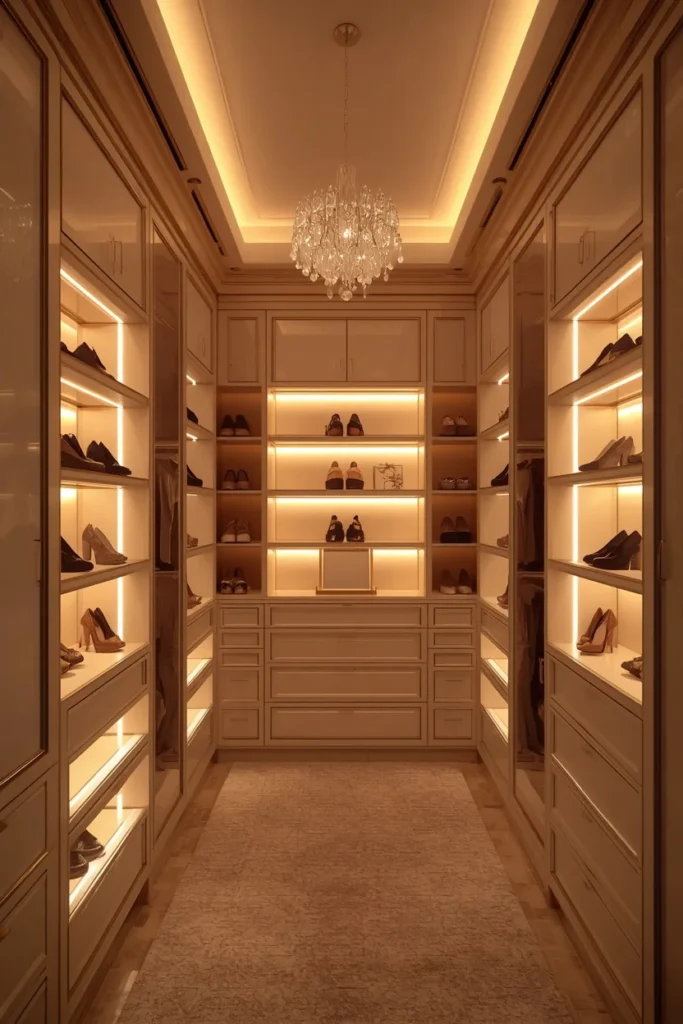
Explanation: A combination of LED task lighting for shelves and hanging rods, along with ambient ceiling lights, is best — layered lighting enhances both function and atmosphere in a way a single source can never achieve. Integrated LED lighting can be used inside hanging zones, along vertical side panels, under shelves, around glass display cabinets, and near vanity mirrors.
Practical Example: Start with evenly spaced recessed ceiling lights for ambient coverage, add LED strip lighting under each shelf (which illuminates the shelf below it so you can see exactly what’s there without pulling items out), and finish with a chandelier or pendant as the accent and visual focal point.
Designer Secret: A strip of LED tape under each shelf costs relatively little per shelf and is one of the most recommended closet upgrades among designers because it makes the space dramatically more usable even without any other change.
7. Choose the Right Color Temperature and CRI
Answer: Bulb color temperature and Color Rendering Index (CRI) matter more in a closet than almost anywhere else in the home — these two specs determine whether your clothes look the same inside as they do in natural daylight.
Explanation: Aim for a high Color Rendering Index (CRI) — ideally 90 or above — to ensure your clothes look the same in the closet as they do in natural daylight. Color temperature should sit between 2700K (warm, flattering) and 3000K (crisp, accurate) for the best balance of accuracy and ambiance.
Practical Example: The reason navy reads as black under many closet lights is a combination of low CRI and a color temperature that doesn’t render the blue wavelength accurately. A CRI 90+ bulb at 3000K eliminates this problem reliably.
Comparison — Closet Lighting by Goal:
| Goal | Recommended Setup | Notes |
| Accurate color matching | CRI 90+, 3000K | Vanity and hanging rod task lights |
| Warm, boutique ambiance | CRI 85+, 2700K | Chandelier, accent, and display lighting |
| Best of both | 3000K task + 2700K accent | Layer both for function and mood |
Quick Tip: Motion-sensor LED lighting inside cabinet sections turns on automatically when doors open, improving both convenience and atmosphere — particularly useful inside deep drawers or upper cabinet sections.
8. Add a Statement Light Fixture as the Visual Centerpiece
Answer: A chandelier or statement pendant in a walk-in closet elevates the space from storage room to destination, signaling that this room was designed with the same intention as the rest of the home.
Explanation: Chandeliers add drama and serve as visual anchors, while LED shelf lighting performs the task work — the statement fixture does the emotional work of making a closet feel like somewhere worth spending time.
Practical Example: A crystal chandelier in a dark, moody charcoal closet makes the space look like a glam boutique and gives that sparkle, making it feel like a luxury experience without requiring any change to cabinetry or layout.
Budget Alternative: A single, well-chosen pendant light centered over a closet island delivers most of the statement-fixture impact at a fraction of the cost of a full chandelier — particularly effective in smaller closets where scale matters.
9. Use Backlighting for Display Zones and Islands
Answer: Backlit shelving and glass display zones transform stored items into curated displays, turning the contents of a closet into part of the design rather than simply things being stored.
Explanation: Backlit display zones highlight premium pieces, creating a boutique-style atmosphere — glass protection keeps collections cleaner while the lighting turns shelves into retail-quality displays.
Practical Example: A backlit onyx island countertop with warm LED panel backlighting in the 2700K to 3000K range creates a focal point that anchors the entire room, turning the island into a luxury showroom piece rather than just a storage surface.
Common Mistake: Installing backlighting behind opaque or heavily colored shelving material where the light source can’t do its job. Backlighting requires either glass-front cabinetry, open shelves, or translucent materials to read correctly.
Color, Finish & Material: The Quiet Luxury Direction (Ideas 10–14)
The 2026 shift in closet design is unmistakable: away from sterile all-white storage boxes toward warm, material-rich spaces that prioritize lifestyle over mere capacity. Color and finish carry most of that emotional weight.
10. Embrace Warm Neutrals Over Stark White
Answer: Warm taupes, creamy beiges, and soft mushroom tones are replacing stark white as the default closet color for 2026, creating a calming atmosphere that feels elevated rather than clinical.
Explanation: Warm taupes, creamy beiges, and soft mushroom shades are replacing stark whites and grays, creating a calming atmosphere while remaining versatile enough to match evolving interior styles.
Practical Example: If you are leaning into minimalism, layering tones like sand, oat, and soft beige keeps a closet from feeling flat or cold — the tonal variation creates depth without introducing contrast that could feel busy.
Common Mistake: Choosing pure white cabinetry based on its appearance in a showroom under bright fluorescent light. In the warmer, lower-light conditions of most closets, pure white can read as yellow-toned or harsh depending on the bulb temperature.
11. Choose Warm Wood Tones for Organic Richness
Answer: Ash, oak, and walnut finishes — in natural, lightly oiled, or matte formats — are the defining material trend for walk-in closets in 2026, replacing the lacquered and painted cabinetry of recent years.
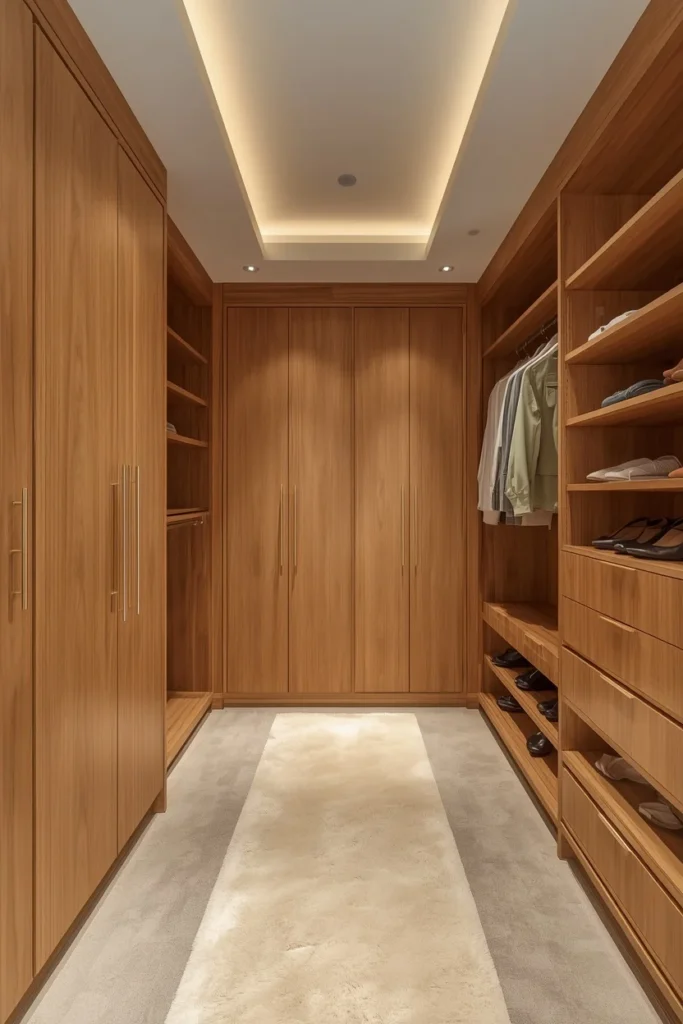
Explanation: Woodgrain textures are trending, particularly in finishes made from ash, oak, and walnut — whether matte or lightly textured, these natural looks bring a sense of organic warmth to walk-in closets and dressing rooms without feeling rustic or dated.
Practical Example: Clean wood cabinetry with simple lines gives a closet a quiet confidence — keep hardware minimal and let the craftsmanship of the wood grain speak for itself, particularly in ash or light oak tones where the natural variation is subtle enough to read as sophisticated.
Designer Secret: Warm wooden doors paired with matte black pulls add crisp contrast while feeling current without looking trendy — both materials age well, which makes this pairing one of the most reliably long-lasting finish combinations available.
12. Go Dark and Moody for a Boutique Statement
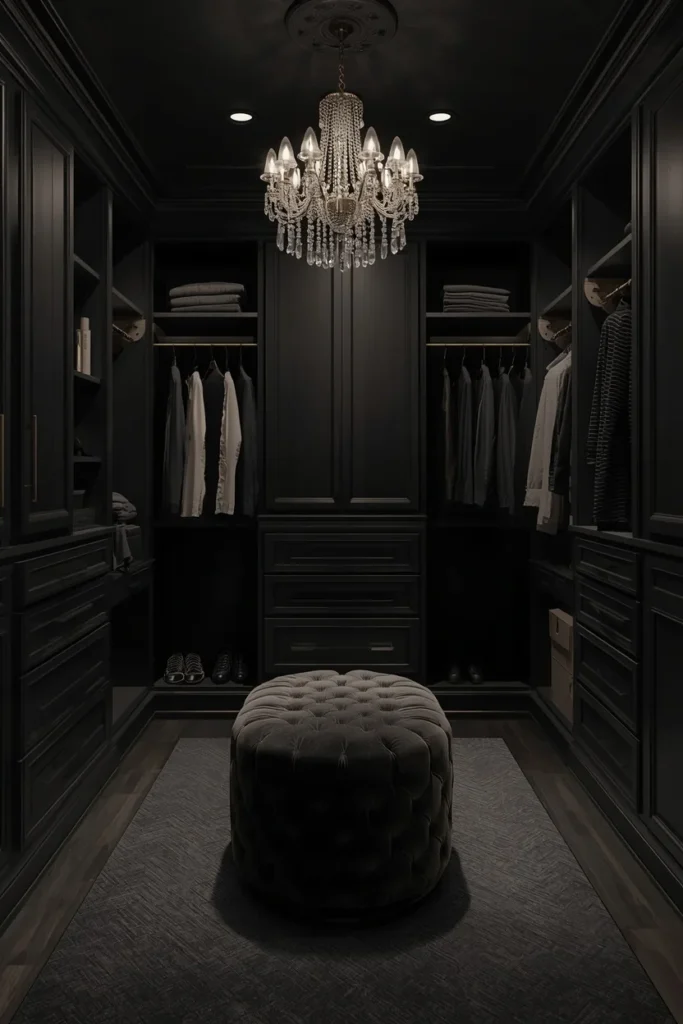
Answer: Deep charcoal, navy, and dark olive closet palettes are gaining significant traction in 2026 as homeowners move beyond safe neutrals and toward spaces with genuine character.
Explanation: A deep charcoal closet feels instantly composed — paneled cabinetry, brass rods, and a soft tufted ottoman at the center create a space that feels less like storage and more like a private dressing lounge, even in the smallest details.
Practical Example: For a similar look, a deep charcoal shade like Sherwin-Williams Iron Ore SW 7069 on the ceiling, paired with Tricorn Black SW 6258 on the cabinetry base and a crystal chandelier as the focal point, creates a wrapped, moody effect that reads like a glam boutique.
Who Benefits: Moody palettes work especially well in closets that lack natural light, where a white or pale palette can look flat or dingy — dark tones absorb the imperfection of artificial light far more gracefully.
13. Install Glass-Front Cabinetry for the Boutique Effect
Answer: Replacing solid cabinet doors with clear or smoked glass transforms storage into display, forcing organization while creating the boutique retail aesthetic that defines 2026’s most aspirational closet design.
Explanation: Glass-front cabinetry creates a boutique-style closet experience — it protects clothing from dust while keeping it visible, which forces you to stay organized and makes outfit selection faster.
Practical Example: Glass-front cabinets stretching floor to ceiling, softly lit from within, turn clothing and accessories into a curated display — the vanity corner then adds a personal touch, like a place to pause before stepping out.
Budget Alternative: Smoked or frosted glass creates the boutique effect at lower visual pressure than clear glass — items are still visible but not in sharp detail, which reduces the maintenance burden of keeping every shelf looking display-ready every day.
14. Add Wallpaper to the Back Wall of Open Shelving
Answer: Applying wallpaper or a bold paint color to the back wall of open shelving is one of the most affordable, removable ways to add personality and depth to a closet without touching the cabinetry.
Explanation: A subtle geometric print or a floral texture applied to the back of open shelves makes plain shelving look completely custom, adding a layer of surprise and visual interest that even expensive cabinetry alone doesn’t achieve.
Practical Example: A back wall in a deep olive tone similar to Sherwin-Williams Ripe Olive SW 6209 turns plain white shelving into a designer showroom with striking contrast — a simple color change that costs almost nothing but reads as completely intentional.
Quick Tip: Peel-and-stick wallpaper makes this idea renter-friendly and fully reversible — a practical choice for anyone who wants the boutique effect without a permanent commitment.
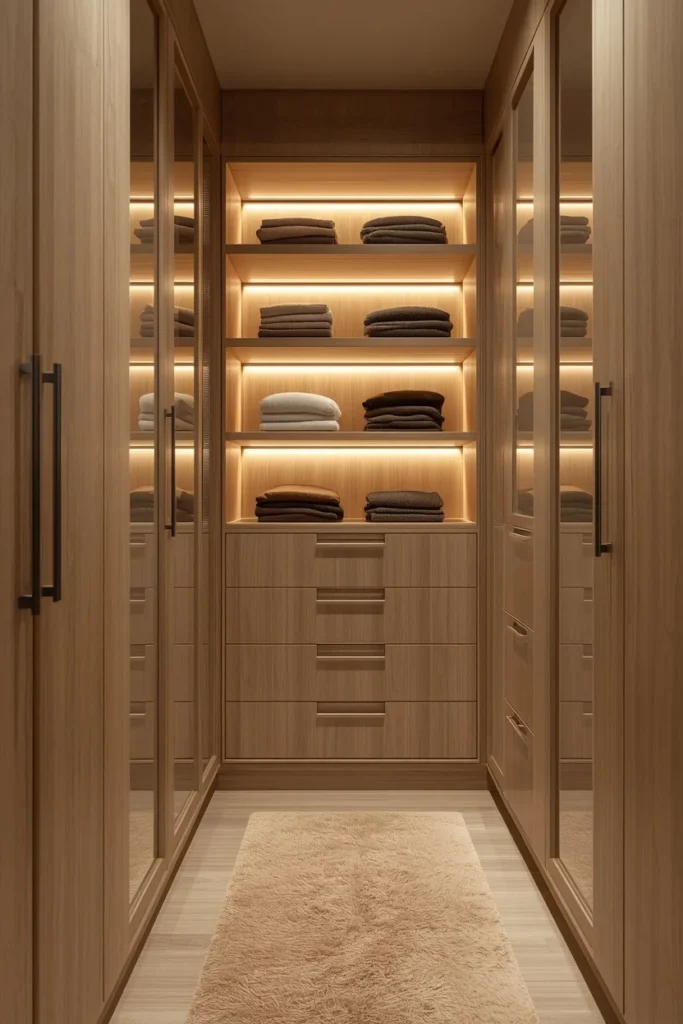
Mini Checklist — Color, Finish & Material Decisions:
- Cabinetry color: warm neutral, dark moody, or natural wood tone
- Door style: glass-front (display), frosted (softened display), or solid (concealed)
- Hardware finish: brass for warmth, matte black for contrast, chrome for clean modern
- Back wall treatment: wallpaper, paint, or contrasting panel
- Floor: extend bedroom flooring for continuity, or add a plush runner
Feature Upgrades: Islands, Vanities & Display Zones (Ideas 15–19)
These are the features that take a closet from well-organized storage to genuine destination — the details that make getting dressed feel like a ritual rather than a rush.
15. Add a Center Island With Jewelry Storage
Answer: A center island is one of the clearest indicators of a luxury walk-in closet, providing both a functional surface for outfit planning and deep drawer storage for accessories.
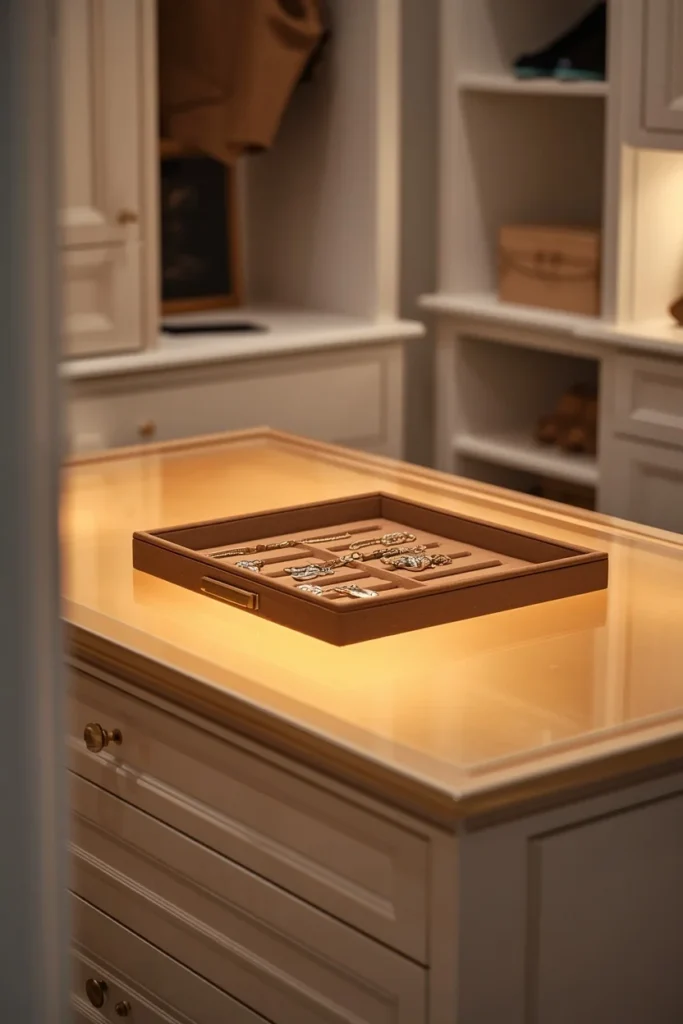
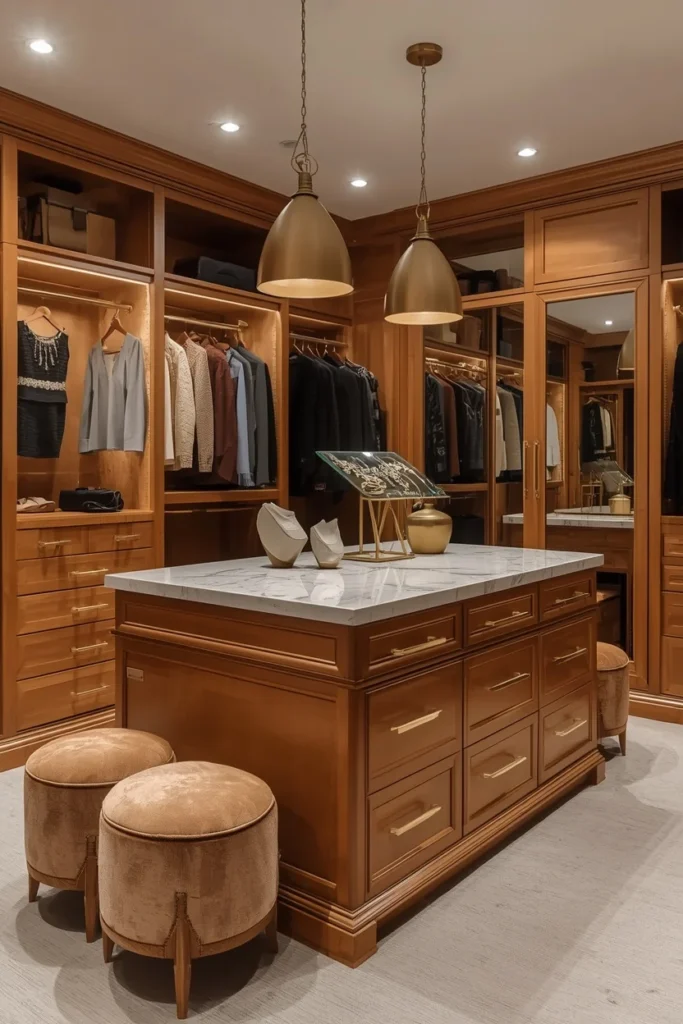
Explanation: With velvet-lined compartments, glass tops, and built-in charging drawers, an island becomes a daily touchpoint of luxury rather than just a storage addition — anchoring the room and changing its entire sense of purpose from storage space to dressing destination.
Practical Example: A central island in stained walnut with glass drawer pulls, velvet-lined accessory displays, and a glass countertop for easy viewing anchors the room and changes its entire sense of purpose — from storage room to dressing destination.
Sizing Guidance: A closet island requires a minimum 24-inch walkway on all accessible sides — ideally 36 inches for comfortable use. An island in a 7×10 room should be no wider than 30 to 36 inches and no longer than 48 to 60 inches to preserve circulation.
Budget Alternative: A freestanding dresser with a marble or quartz top placed in the center of a larger closet delivers most of the island’s function and visual presence at a fraction of the cost of custom millwork.
16. Build a Dedicated Vanity Zone
Answer: A built-in vanity inside the walk-in closet combines dressing and grooming into one seamless morning routine — eliminating the bathroom counter scramble for those with the space to implement it.
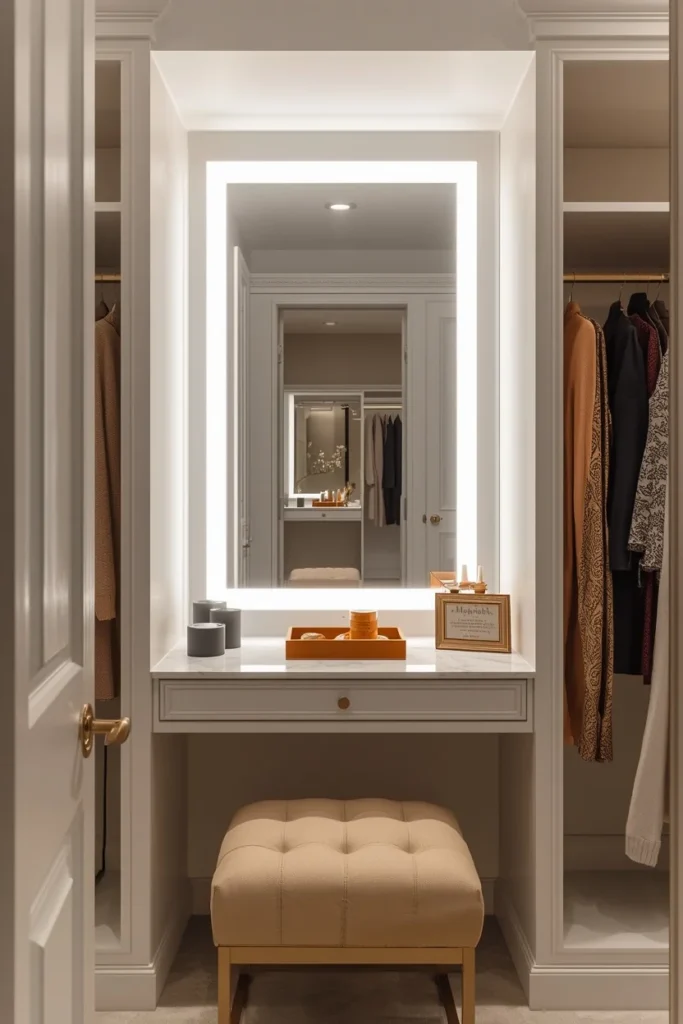
Explanation: A closet vanity typically includes a countertop at approximately 30 inches for seated use, paired with a comfortable stool, with excellent lighting around the mirror as the non-negotiable element — this is not the place to scrimp.
Practical Example: LED strip lighting around a mirror provides even, shadow-free illumination that’s essential for makeup application or detailed grooming tasks, while a three-way mirror offers views from multiple angles that a single bathroom mirror can never provide.
Designer Secret: Building electrical outlets directly into the vanity surface eliminates extension cords and allows hair tools to be used right where they’re needed — a detail that costs relatively little to add during construction but is difficult to retrofit later.
17. Create a Dedicated Shoe Wall With Angled Display Shelves
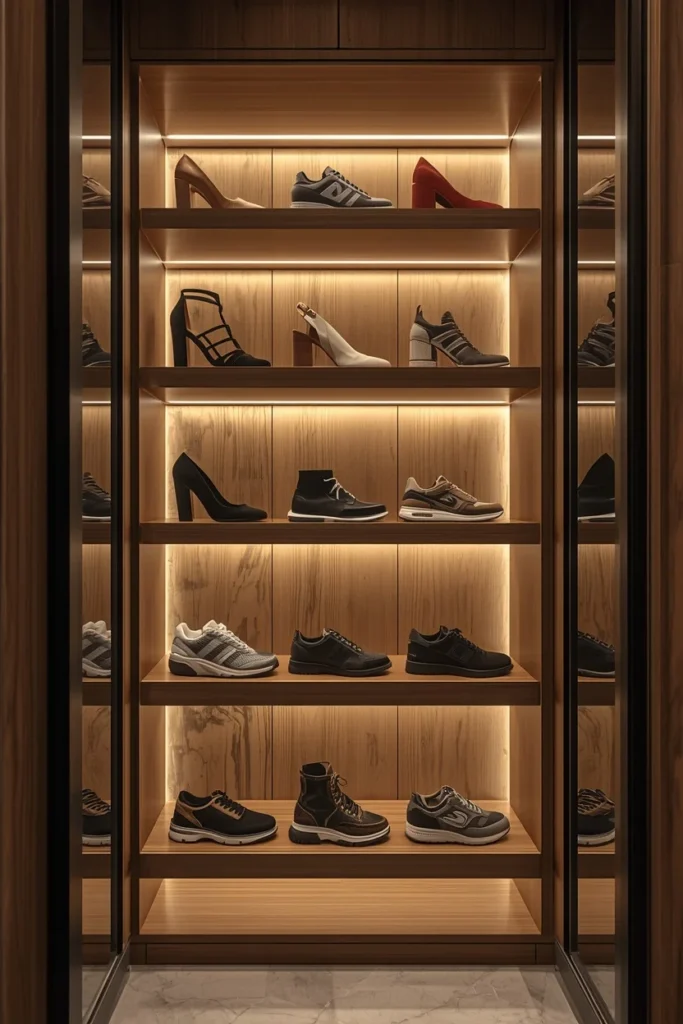
Answer: A shoe wall with angled shelves turns the most visually appealing part of many wardrobes into intentional decor, making shoe selection faster while adding genuine personality to the closet.
Explanation: Angled shoe shelves improve visibility, making it easier to select shoes without pulling everything out — and backlit display zones highlight premium pieces, creating a boutique-style atmosphere that flat horizontal shelves simply can’t replicate.
Practical Example: Glass protection above angled shelves keeps collections cleaner, especially in closets that connect directly to bedrooms where dust is an ongoing concern — while the lighting turns the shoe wall into a genuine retail-quality display.
Quick Tip: Adjustable shoe shelves matter more than fixed ones — heeled shoes, boots, sneakers, and flat sandals all require different shelf heights, and a system that can’t adapt forces compromise in every category.
18. Design a Bag and Accessory Display Section
Answer: Dedicated handbag display — whether on open shelves, hooks, or behind glass — elevates accessories from stored items to visible design elements, and makes the daily outfit-building process genuinely faster.
Explanation: This boutique-style display turns handbags into statement pieces, giving them the protection and attention they deserve — and when bags are visible, they get used; when they’re buried, they get forgotten.
Practical Example: Glass shelving towers with built-in lighting house shoes and bags so they feel like a boutique window display — the island beside them anchors the space, and a globe chandelier overhead gives the whole arrangement a destination feel.
Common Mistake: Storing bags on a single shelf without dividers or individual display spaces. Bags stacked or crowded together lose their visual impact and get damaged by rubbing against each other — a simple shelf divider or individual hook for each bag resolves both problems.
19. Add a Seating Area for the Full Dressing Room Experience
Answer: A seating element — a tufted bench, a plush ottoman, or a corner chair — elevates a walk-in closet into a full dressing room by providing a place to sit, plan outfits, put on shoes, and simply pause before the day begins.
Explanation: Well-placed seating adds comfort and serves as an opportunity to introduce texture and color through upholstery — a tufted bench at the foot of an island creates a symmetrical, balanced look while providing that essential seated function for putting on shoes or planning an outfit.
Practical Example: A channel-tufted bench that can be slid under the island counter when not needed solves the dual challenge of adding seating without permanently consuming floor space in a smaller closet.
Who Benefits: Seating matters most for closets shared by two people who need to dress simultaneously — one at the hanging rods, one seated — without getting in each other’s way.
Mini Checklist — Feature Upgrade Priority:
- Island or freestanding dresser (function + visual anchor)
- Vanity with proper lighting (morning routine game-changer)
- Shoe wall with angled, adjustable shelves (visibility + display)
- Bag and accessory display (uses accessories as decor)
- Seating (completes the dressing room experience)
Small Walk-In Closet Ideas That Punch Above Their Weight (Ideas 20–24)
A smaller footprint doesn’t mean settling for less. Many of the strongest closet design principles — zoning, lighting, vertical storage, boutique display — work better in compact spaces precisely because every decision is visible and every detail matters.
20. Turn a Narrow Corridor Into a Glowing Wardrobe
Answer: A slim corridor closet with integrated lighting along every shelf edge becomes a modern, intentional dressing space — the linear design guides movement through the space naturally, making even tight layouts feel considered.
Explanation: A slim corridor transforms into a glowing wardrobe with integrated lighting along every edge — the linear design guides you through the space effortlessly while feeling both modern and warm.
Practical Example: LED strip lighting running along the underside of every shelf in a narrow corridor closet creates a continuous band of warm light that makes the space feel designed rather than improvised, even when the corridor is only five feet wide.
Quick Tip: In a corridor layout, use the wall at the far end as a visual focal point — a full-length mirror, a piece of framed art, or a single backlit display shelf makes the space feel intentional from the moment you walk in.
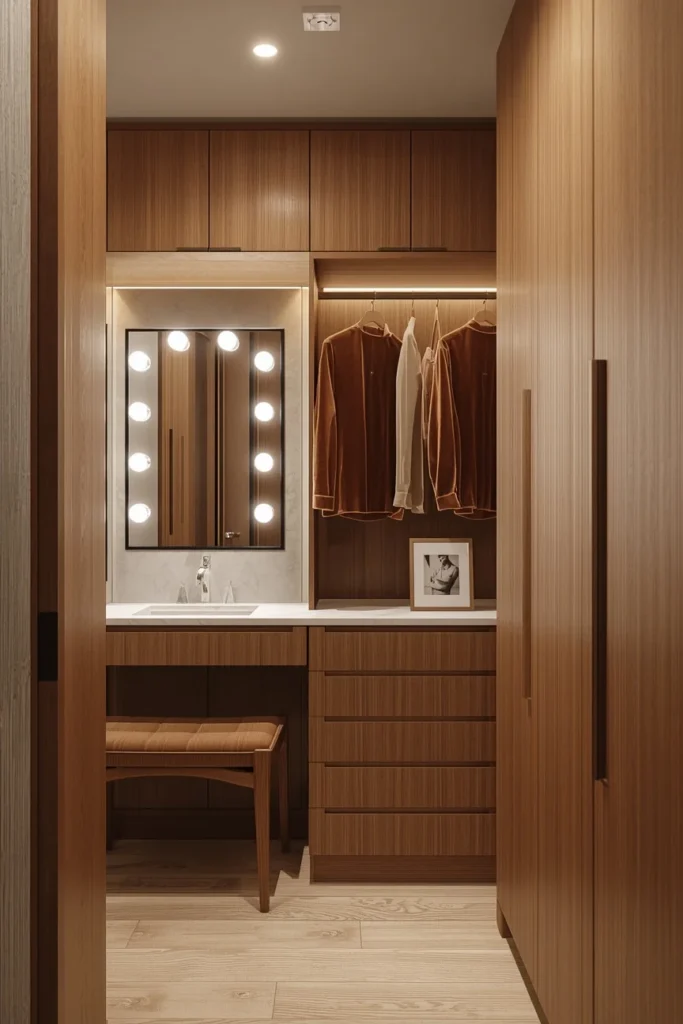
21. Build a Compact Vanity Into an Awkward Corner
Answer: An awkward closet corner — too narrow for a hanging rod, too small for a full shelving unit — is the ideal location for a compact vanity nook, turning a layout problem into a design feature.
Explanation: A narrow layout transforms into a functional dressing zone with a built-in vanity and mirror — the lighting framing the mirror adds a soft glow that feels flattering and intentional, proving that even smaller spaces can feel complete.
Practical Example: Even a 30-inch-wide nook can house a counter, a mirror, and two shallow drawers — enough for a full vanity function when paired with proper lighting, regardless of what happens in the rest of the closet.
Common Mistake: Treating every corner as wasted space and filling it with shelving rather than a functional feature. Corners that receive natural or task light are often the strongest candidates for a vanity or seating nook.
22. Use Modular Systems to Build Custom Results
Answer: Modular systems like IKEA PAX or The Container Store Elfa can deliver genuinely custom-looking results in small closets without the cost or lead time of full bespoke millwork.
Explanation: DIY modular systems are the most budget-accessible route, with systems like IKEA PAX and The Container Store Elfa starting at a fraction of the cost of custom cabinetry — and both can be reconfigured as your storage needs change.
Practical Example: An IKEA PAX system with custom glass-front doors, brass handles, and integrated LED strips inside can pass for expensive custom cabinetry from most angles — the hardware and lighting upgrades do most of the elevation at a minimal additional cost.
Budget Comparison:
| System Type | Approximate Cost | Best For |
| DIY modular (IKEA PAX, Elfa) | $500–$2,500 | Renters, budget refreshes, flexible layouts |
| Semi-custom (California Closets, etc.) | $3,000–$10,000 | Homeowners wanting more design flexibility |
| Full custom millwork | $10,000–$30,000+ | Permanent installations, high-end finishes |
23. Style Your Closet Like a Capsule Wardrobe
Answer: Treating the closet as a curated display — editing the wardrobe down, matching hangers, color-coding by category — creates a boutique feel from any cabinetry, regardless of budget.
Explanation: A tight color story instantly elevates even a simple shelving system — when everything speaks the same visual language, the space feels composed, calm, and quietly expensive, without requiring a single hardware upgrade.
Practical Example: Matching velvet hangers in a single color, folded items arranged by tone, accessories in individual trays or boxes — these habits cost nothing but change how the closet reads entirely, making even a basic IKEA system look like a designer installation.
Designer Secret: Keeping fewer pieces on display maintains the elevated, showroom-like atmosphere — a decluttered closet with beautiful organization consistently photographs better and functions better than an overfilled one with expensive cabinetry.
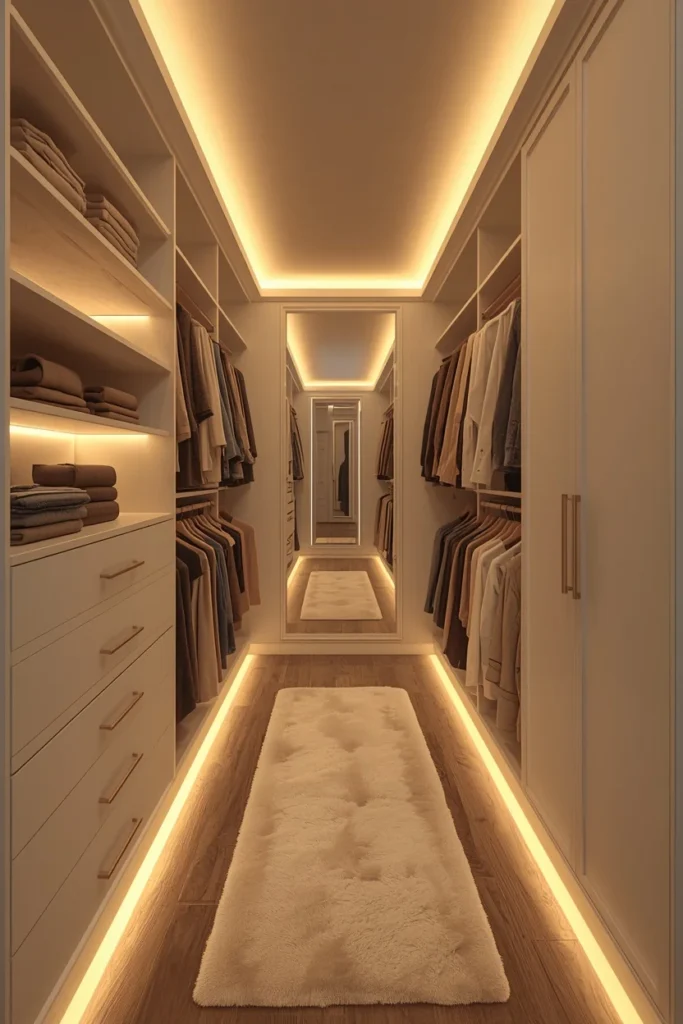
24. Add a Plush Rug and Personal Decor for the Finishing Layer
Answer: A rug runner down the center of a closet, paired with one or two personal decorative elements, completes the transition from storage room to genuine dressing sanctuary.
Explanation: A plush runner rug softens the acoustics (closets can be echoey), feels warm underfoot on cold mornings, and adds color and texture — while a small piece of framed art or a decorative fragrance tray signals that this space was finished with the same care as the rest of the home.
Practical Example: Art belongs in the closet — lean a framed print on a shelf or hang a small gallery wall near the door. A scented candle or a signature perfume displayed on the island adds both a sensory layer and a personal touch that transforms a purely functional room into a personal sanctuary.
Common Mistake: Treating the rug as optional because “nobody sees the closet.” The rug is for you — the tactile warmth underfoot and the visual softening it provides affects how the space feels every single morning, regardless of who else visits.
Mini Checklist — Small Closet Finishing Layer:
- A plush runner rug sized to the walkway (not the whole room)
- One piece of art or a framed print near the entrance
- A scent element (candle or perfume) displayed on a surface
- Matching hangers in a single material and color
- Everything edited, not just organized — less is genuinely more
Designer Tips: The Walk-In Closet Upgrade Sequence
Whether you’re starting from scratch or refreshing an existing closet, this sequence gets you the most impact per decision:
- Declutter completely first. Take everything out. Sort by category. Return only what earns its place. This step alone reveals the actual layout problems — and solves a third of them before anything is purchased.
- Fix the lighting before the finishes. LED strips under shelves and a warmer, higher-CRI overhead bulb cost less than any cabinet upgrade and immediately change the closet’s entire mood and usability.
- Convert single rods to double-hang. This is the most space-efficient single change available and costs less than a new shelf unit.
- Zone before you organize. Group by category first (hanging, folded, shoes, accessories), then organize within each category. Organization within a poorly zoned layout always reverts to chaos.
- Add one personal element last. A rug, a piece of art, a statement scent. This is what makes the closet feel finished rather than merely functional.
Common Mistakes to Avoid
Mistake: Choosing finishes before fixing the layout. Beautiful cabinetry in the wrong configuration wastes money and still produces a frustrating daily experience. Always resolve the layout first.
Mistake: Installing low-CRI or cool-temperature lighting. This is the single most common reason people leave the house in mismatched colors. A high-CRI bulb at 2700K–3000K costs the same as a poor-quality bulb and solves the problem entirely.
Mistake: Treating all items equally in the layout. Not all clothing is used equally — everyday pieces should be the most accessible, seasonal items the least. Treating every zone as equally important wastes the most valuable real estate.
Mistake: Buying cabinetry for the wardrobe you wish you had, not the one you have. A closet system designed for 40 shoe pairs when you own 12 wastes space and money. Map your actual wardrobe before sizing any storage category.
Mistake: Skipping the rug and personal decor. These finishing touches aren’t decorative extras — they’re what make a closet feel like a space you want to spend time in rather than pass through. The difference between a styled and an unstyled closet is more emotional than functional.
FAQs
Conclusion
A dream walk-in closet isn’t defined by its square footage or its budget. It’s defined by how clearly it was designed for the person using it — the wardrobe it actually holds, the morning routine it actually supports, the style it actually reflects.
Start with layout and lighting. These two foundations deliver more impact than any material or hardware upgrade, and they cost far less. From there, add one feature at a time — the right color palette, a shoe wall, a vanity nook, a plush rug — and let the closet grow into its potential rather than trying to complete it all at once.
When your closet makes you feel calm, organized, and excited to get dressed, it’s working. That’s the dream, and it’s more achievable than most people realize.